Saturday, April 28, 2012

Bacon-Cheese Topped Chicken

Olivia has a very good friend whose wife is an extraordinary cook!  This friend is a retired teacher who acted as a true mentor when Olivia first started teaching.  Luckily, even though this gentleman has retired he and Olivia have kept in touch.  In many ways, he has become like a second father to her.  Recently he and his wife invited Olivia and her husband to their home for dinner.  This recipe, which originally came from Taste of Home, was the main attraction for that evening.  Olivia raved about it.  I haven't had it yet, but the picture looks fabulous.

When Olivia originally tasted it, the recipe was made totally with maple syrup.  When Olivia made it herself, she used 1/4 cup honey and 1/4 cup syrup.  Olivia also substituted onions for the mushrooms--just out of personal preference.  Olivia tells me it comes out looking like it is coated with some kind of marvelous barbecue sauce and is very flavorful.  Hope you enjoy it!  Let's be honest here--it has bacon, chicken, cheese and the sweetness of honey and/or syrup--how could you NOT enjoy it?
- Nanette


Bacon-Cheese Topped Chicken
Ingredients
  • 1/2 cup Dijon mustard
  • 1/2 cup honey (or maple syrup or 1/4 c. syrup,1/4 cup honey) 
  • 4-1/2 teaspoons canola oil, divided
  • 1/2 teaspoon lemon juice
  • 4 boneless skinless chicken breast halves
  • 1/4 teaspoon salt
  • 1/8 teaspoon pepper
  • Dash paprika
  • 2 cups sliced fresh mushrooms
  • 2 tablespoons butter
  • 1 cup (4 ounces) shredded Monterey Jack cheese
  • 1 cup (4 ounces) shredded cheddar cheese
  • 8 bacon strips, partially cooked
  • 2 teaspoons minced fresh parsley

Directions

In a small bowl, combine the mustard, honey, 1-1/2 teaspoons oil and
lemon juice. Pour 1/2 cup into a large resealable plastic bag; add
the chicken. Seal the bag and turn to coat; refrigerate for 2 hours.
Cover and refrigerate the remaining marinade.

Drain and discard marinade from chicken. In a large skillet over
medium heat, brown chicken in remaining oil on all sides. Sprinkle
with salt, pepper and paprika. Transfer to a greased 11-in. x 7-in.
baking dish. In the same skillet, saute mushrooms in butter until tender. Spoon
reserved marinade over chicken. Top with cheeses and mushrooms.
Place bacon strips in a crisscross pattern over chicken.

Bake, uncovered, at 375° for 20-25 minutes or until a meat
thermometer reads 170°. Sprinkle with parsley. Yield: 4
servings.

Recipe Source:  Taste of Home


Sunday, April 22, 2012

Hash Brown Casserole

Here is a great, quick hashbrown casserole that was featured in a recent Walmart flyer.  If there are leftovers, they make a great side dish for breakfast!  It can even be made healthier by using low fat chicken soup, low fat sour cream, and low fat cheese.  The corn flakes on top add a nice texture to the dish.  If you take the time to make this one, you will not be dissapointed. 
-Nanette

Hash Brown Casserole


Ingredients:

2 lb frozen hash browns
1/2 cup melted butter
1 tps salt
1/4 tsp pepper
1/2 cup onoins
1 can cream of chicken soup
2 cups grated cheddar cheese
2 cups corn flakes
1/4 cup melted butter
8 oz sour cream

Directions:

Butter 9x13 baking dish. Mix all ingredients and pour into dish. Combined 2 cups crushed corn flakes and 1/4 cup melted butter. Sprinkle on top bake at 350º for 1 hr

BONUS TIP:  Enjoy browsing new and interesting cooking web sites?  Check out http://www.farmflavor.com/.  It has great information about using local foods, farmers' markets, recipes, and beautiful photographs of their foods.  Check it out!


Wednesday, April 18, 2012

Stuffed Jalapeno Peppers

Do you like stuffed jalapeno peppers but tend to only get them as a restaurant appetizer?  If so, maybe it is because you just don't like the price of frozen ones at the grocery or you don't want to take the time to make them at home.  Olivia has developed a great alternative that is healthier,  you can make them ahead and you can use whenever you like.  When she made these, she sprinkled the corn flakes on top and put the tray in the freezer. 
When they were frozen, she divided them onto paper plates and slid the paper plates into  large freezer bags.  This kept them from getting damaged and made them easy to pull out, place on a baking sheet, and and bake.  They keep a long time in the freezer and are absolutely delicious!  What's not to love?
-Nanette

Stuffed Jalapeno Peppers

18 jalapeno peppers (2 ½ - 3 inches in length)
1 garlic clove, pressed
1 package (8 ounce) fat-free cream cheese, softened
1 cup (4 ounces) reduced-fat shredded sharp cheddar cheese
¼ cup fat-free mayonnaise
½ teaspoon dried oregano leaves
2 egg whites
1 tablespoon skim milk
2 cups corn flake cereal, crushed
salsa (optional)

Preheat oven to 350 degrees.  Cut each pepper in half lengthwise; remove seeds and membranes.  Pres garlic into 1 quart batter bowl using a garlic press.  Add cream cheese, cheddar cheese, mayonnaise, and oregano; mix well using a spatula.  Cut a small tip off of a corner of a plastic sandwich bag and fill with the cream cheese mixture.  Pipe about 1 tablespoon of the mixture into each pepper half to fill.  Lightly whisk egg whites and milk together.  Finely crush corn flakes in sealed plastic bag.  Dip each pepper half into egg mixture, then into corn flake crumbs to coat.  Place pepper halves on a cookie sheet which has been sprayed with an oil spray.  Bake 30 minutes or until peppers are tender.  Serve with salsa, if desired.

Thursday, April 12, 2012

Hawaiian Pizza

Weeknight meals may often pose the problem of needing to get a meal on the table in a short amount of time.  I came up with this recipe as a quick solution to that problem tonight.  I had delicious ham left over from Easter dinner that we had with my parents.  My parents gave us quite a bit of ham to bring home with us and enjoy this week.  The ham came in handy tonight.  :)  This recipe is not an exact one, so have fun with it!


Hawaiian Pizza


Ingredients:
  • 1 - 2 cups of ham, diced
  • 1 medium purple onion, diced
  • 1/2 - 1 cup of BBQ sauce (Your favorite brand will work!)
  • half a can of diced pineapple, drained
  • 1 tablespoon olive oil
  • 1-1/2 cups cheese (Use up odds and ends from your refrigerator.  I had a bit of mozzarella, cheddar, and Colby Jack, so I used up all of my little bits of all three.)
  • 1 tube of Pillsbury pizza dough
Directions:
  1. Preheat your oven according to the pizza dough directions.  Unroll the pizza dough and spread it evenly on a cookie sheet.  Prebake your pizza dough according to the directions on the tube of dough.
  2. While your crust is prebaking, heat the olive oil in a small skillet over medium heat.  Sauté the diced onions until they are tender.  Add the ham to the skillet and stir.
  3. After prebaking, use the back of a spoon to spread the BBQ sauce over the pizza crust.
  4. Spread the ham and onion mixture over the pizza, along with the pineapple.
  5. Top the pizza with a sprinkling of the cheese(s).
  6. Bake your pizza according to the directions on the tube of dough.  I baked mine for about another ten minutes.
  7. Slice your pizza and enjoy!  :)
Happy Cooking!
-Olivia

Wednesday, April 11, 2012

CLASSIC SAUERBRATEN


Please forgive the picture of this dish.  I don't have a good picture of it, but do have the original recipe card with a picture on it that I have managed to keep track of from a collection I had back in the seventies!  Anyone who knows me, knows that for me to keep track of a recipe for that long--it has to be good.  It is even written on real paper--not papyrus or stone (ha!).  If there is someone you know who is a real meat lover, they will enjoy this dish. 

4 lb. pot roast, chuck
2 cups water
2 cups vinegar
2 onions, sliced
3 bay leaves
10 whole cloves
6 peppercorns
1 T. salt
1/4 tsp. pepper
2 T. sugar
flour
3 T. fat
12 gingersnaps, crushed

Place meat in a large bowl. Cover with mixture of water, vinegar, onion, bay leaves, cloves, peppercorns, salt, pepper, and sugar.  Cover and refrigerate for 36 to 48 hours, turning meat once or twice each day.  Remove meat, pat dry, rub lightly with flour and brown well in hot fat.  Strain vinegar mixture and add to meat.  Cover and simmer until meat is tender (3-4 hours).  Remove meat, keep warm.  For gravy, skim excess fat from liquid in pan; stir in gingersnaps.  Cook over low heat until thickened.  Pour gravy over sliced meat.  Makes 6-8 servings.  

This recipe is an old one and, yes, it is labor intensive, but it is oh so worth it!  The meat smells and tastes out of this world.  If you really want to go for the whole German effect, serve it with spaetzle or noodles and maybe a side of red cabbage.  I know it sounds a bit weird to add the gingersnaps, but they make it very good!
-Nanette

Thursday, April 5, 2012

Saving Money with a YUMMY Recipe!

It seems as though every time I go to the grocery, I notice food costs continuing to go up.  One way I save money is by buying bone-in, skin-on chicken breasts instead of boneless, skinless chicken breasts.
See full size image


Now, before I go on any further with this post, I have to share my tale of woe.  I had taken pictures of how much chicken I got off of my bone-in, skin-on chicken breasts, the prep work I did ahead, and the final food created with the recipe which will follow, but I had a mishap, and the pictures didn't end up on my phone.  When I told my husband about this, he said with a hopeful tone, "Soooooo....you have to make it again?!?"  To say the recipe I made last night was a hit is an understatement.  Since I didn't want to wait to post this until next week, when I make this again, I thought I'd go ahead and post, even without the pictures.  Please forgive the lack of pics!  :)

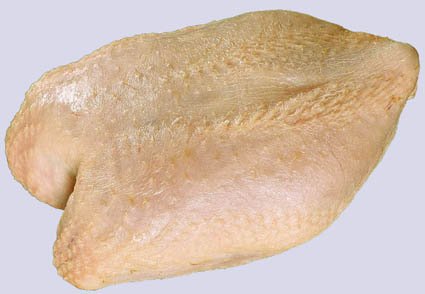
So back to the money savings here...  I put the bone-in, skin-on chicken breasts in a gallon sized bag with the marinade the night before I was going to grill them.  The package of chicken I was able to get on sale had three enormous pieces in it, and was $2.97.  It was an awesome deal! 

After marinating chicken overnight, I grilled the chicken when I had the grill going for another meal.  I wanted to get the chicken cooked so I could have a quick meal the following night.  I allowed the chicken to cool after I grilled it, so I could easily take it off the bone.  I put the chicken in a plastic container and stored it in the fridge.  I also cut the onions and peppers the night before.  Storing them in a gallon sized bag was an easy way to have everything ready to throw together when I wanted to prepare them.

The flavor of brushing the lime butter over the quesadillas gives this recipe a blast of flavor on the shell of the tortilla.  I sprinkled a bit of  Fleur de Sel Salt from the S.A.L.T. Sisters website.  This salt works wonderfully as a finishing salt and added the perfect touch on these quesidillas.  (You can order it here:  http://www.saltsistersonline.com/classicsalt/product/fleur-de-sel-organic-french-grey-sea-salt

With a bit of thinking ahead, you can easily save money and have a delicious meal with this recipe.  Please let us know how you like it if you try it!  :)

-Olivia

Margarita Chicken Quesadillas

Recipe from:  Taste of Home

Ingredients

  • 4 boneless skinless chicken breast halves (5 ounces each)
  • 3/4 cup thawed frozen limeade concentrate
  • 1 large onion, sliced
  • 1 medium sweet orange pepper, julienned
  • 1 medium sweet yellow pepper, julienned
  • 2 tablespoons canola oil
  • 1/4 teaspoon salt
  • 1/4 teaspoon pepper
  • 4 flour tortillas (10 inches)
  • 1 cup (4 ounces) shredded Monterey Jack cheese
  • 1 cup (4 ounces) shredded cheddar cheese
  • 2 tablespoons butter, melted
  • 1 tablespoon lime juice
  • 1 tablespoon chopped fresh cilantro
  • Lime wedges, optional

Directions

Place chicken in a large resealable plastic bag; add limeade
concentrate. Seal bag and turn to coat. Refrigerate for 6 hours or
overnight.

In a large skillet, saute the onion and sweet peppers in oil until
tender; season with salt and pepper. Set aside.

Moisten a paper towel with cooking oil; using long-handled tongs,
lightly coat the grill rack. Drain and discard marinade. Grill 5-8 minutes
on each side or until a thermometer reads 170°. Cut chicken into 1/4-in. strips; set aside.

On one half of each tortilla, layer Monterey Jack cheese, chicken,
pepper mixture and cheddar cheese; fold over. Place quesadillas on a
baking sheet. Combine butter and lime juice; brush over tortillas.
Bake at 350° for 8-10 minutes or until cheese is melted.

Cut each quesadilla into 4 wedges. Sprinkle with cilantro; serve with
lime wedges if desired. Yield: 16 wedges.

Monday, April 2, 2012

Maple Bacon Biscuits

These biscuits are so yummy on a chilly morning.  A couple of weeks ago my mom posted pictures from the Maple Syrup Festival.  This recipe is a delcious way to use one of nature's sweetest gifts - maple syrup.  This is a very forgiving recipe, and a very delicious recipe at that.  To start off, you need:

  • 1/2 pound of bacon. cut into pieces, cooked in a skillet on the stove
  • 1/8-1/4 cup flour (depending on how much bacon grease you use)
  • 1 cup maple syrup
  • 1/4-1/2 brown sugar (depending on how sweet you want your biscuits to be)
  • 3/4 cup chopped pecans
After you cook the bacon on the stove, remove it using a slotted spoon and place the bacon in the bottom of a round baking dish.  I use a springform pan, but it isn't a necessity.  Add the flour to the grease on the stove, and stir to get all of those yummy bacon drippings off of the bottom of the pan.  If for some reason you have a lot of bacon grease, you may want to remove part of it first. After the flour is stirred in, add the maple syrup and brown sugar to the pan and heat to combine.  As the syrup is warming up, sprinkle the chopped pecans in the bottom of your baking dish on top of the bacon.  After the syrup is warm and bubbly, pour it over the bacon and pecan pieces and you end up with this......Mmmmmmm.....


Now, you could use your favorite biscuit recipe and make homemade biscuits to top the warm, gooey syrup, but I was in a hurry when I last made these, so I used canned biscuit dough.  Just place the biscuits on top of the syrup nice and snug.

If you do as I did and use premade biscuits, bake your dish at the temperature on the package.  You will likely need to bake them for LONGER than the package says since you have them all snug as a bug in a rug in the pan.  As soon as the biscuits look like they are baked, pull the pan out of the oven and carefully invert the pan on a serving dish, and this is what you get.  Seriously, these are delicious...

Happy Cooking!
Olivia