Sunday, September 28, 2014

CARAMEL APPLE BARS

CARAMEL APPLE BARS
Olivia found this Betty Crocker recipe and it is a winner.  Use whatever variety of apple is your favorite.  Olivia found a great variety this year called a Golden Supreme.  I am partial to Galas.  Pick one you like or, better yet, make a trip  to your local orchard and pick your own variety to try.  You won't be sorry.  Apples are one of our favorite seasonal foods because they are good plain or offer a multitude of ways to add flare to them.

When Olivia made this recipe recently, she didn't have the caramels as called for, but she did have some caramel apple dip that she substituted.  This variation made the recipe more like a wonderful apple crisp than a bar, but it was still mighty tasty.  Don't be afraid to substitute and be adventurous.  -Nanette


CARAMEL APPLE BARS

1
cup packed brown sugar
1/2
cup butter or margarine, softened
1/4
cup shortening
1 3/4
cups Gold Medal™ all-purpose flour
1 1/2
cups quick-cooking oats
1
teaspoon salt
1/2
teaspoon baking soda
4 1/2
cups coarsely chopped peeled tart apples (3 medium)
3
tablespoons Gold Medal™ all-purpose flour
1
bag (14 ounces) caramels

  • Heat oven to 400ºF. Mix brown sugar, butter and shortening in large bowl. Stir in 1 3/4 cups flour, the oats, salt and baking soda. Reserve 2 cups oat mixture; press remaining oat mixture in ungreased rectangular pan, 13x9x2 inches.
  • Toss apples and 3 tablespoons flour; spread over mixture in pan. Heat caramels over low heat, stirring occasionally, until melted; pour evenly over apples. Sprinkle with reserved oat mixture; press lightly.
  • Bake 25 to 30 minutes or until topping is golden brown and apples are tender. For 36 bars, cut into 6 rows by 6 rows while warm. Store covered in refrigerator.

Sunday, September 21, 2014

CANNING VEGETABLE SOUP


VEGETABLE SOUP HOME CANNED
Olivia and I have still been canning, but the batches are becoming fewer as the season winds down. We both recently processed large quantities of apples.  She used Golden Supreme apples to make apple butter and I used Galas to make applesauce.  Today I made home canned vegetable soup using the Ball Blue Book recipe as my "guide" to make the soup.  I am publishing the recipe below, but want to make it clear I never use the same combination of vegetables twice.  It really depends upon what I have available.  Today I used peas instead of lima beans.  Sometimes I use green beans.  As long as you use a similar proportion of ingredients and use the proper processing times, you should have success.  I also like to add a couple of tablespoons of thyme and basil to my soup.  My batch today netted six quarts and one pint.  This too may vary from batch to batch.  If I am a little short of tomatoes, I also sometimes add canned tomato juice to get the consistency I want.

We have always enjoyed homemade vegetable soup.  There is nothing better on a cold winter day than opening a jar of vegetable soup and maybe pairing it with a toasted cheese sandwich.  This combination can chase away the worst case of the winter blues.  Hope you enjoy it!
-Nanette

Vegetable Soup
  • 8 cups chopped, peeled, cored tomatoes (about 4 lb or 12 medium)
  • 6 cups cubed and peeled potatoes (about 6 medium)
  • 6 cups 3/4-inch sliced carrots (about 12 medium)
  • 4 cups green lima beans (about 1-1/2 lb)
  • 4 cups uncooked corn kernels (about 9 ears)
  • 2 cups 1-inch sliced celery (about 4 stalks)
  • 2 cups chopped onions (about 2 medium)
  • 6 cups water
  • Salt, optional
  • Pepper, optional
  • (32 oz) quart or 14 (16 oz) pint glass preserving jars with lids and bands

DIRECTIONS:

  1. PREPARE pressure canner. Heat jars and lids in simmering water until ready for use. Do not boil. Set bands aside.
  2. COMBINE all vegetables in a large saucepot. Add water. Bring to a boil. Reduce heat and simmer 5 minutes. Season with salt and pepper, if desired.
  3. LADLE hot soup into hot jars leaving 1 inch headspace. Remove air bubbles. Wipe rim. Center hot lid on jar. Apply band and adjust until fit is fingertip tight.
  4. PROCESS filled jars in a pressure canner at 10 pounds pressure 55 minutes for pints and 1 hour and 25 minutes for quarts, adjusting for altitude. Remove jars and cool. Check lids for seal after 24 hours. Lid should not flex up and down when center is pressed.


Sunday, September 14, 2014

PUMPKIN BARS

PUMPKIN BARS
This scrumptious recipe is a Paula Deen creation.  When you make it, I guarantee your house will smell amazing.  Fall is just days away and all things pumpkin will be making their way to the table.  If you make this for your family or friends, I'm sure it will be a hit.

While Olivia and I are sorry to see summer pass and the bounty that garden fresh ingredients provide, we are also looking forward to enjoying all of the yummy things we have home canned and frozen.  Most foods are available year round anymore, but eating things when they are in seasons and REALLY fresh, is such a gift.  Pumpkin is one of those seasonal favorites.  Hope you enjoy this tasty recipe featuring an autumn favorite.
-Nanette


PUMPKIN BARS

Ingredients

Bars:

4 eggs
1 2/3 cups granulated sugar
1 cup vegetable oil
15 -ounce can pumpkin
2 cups sifted all-purpose flour
2 teaspoons baking powder
2 teaspoons ground cinnamon
1 teaspoon salt
1 teaspoon baking soda

Icing:
8 -ounce package cream cheese, softened
1/2 cup butter or margarine, softened
2 cups sifted confectioners' sugar
1 teaspoon vanilla extract
Directions

Preheat the oven to 350 degrees F.

Using an electric mixer at medium speed, combine the eggs, sugar, oil and pumpkin until light and fluffy. Stir together the flour, baking powder, cinnamon, salt and baking soda. Add the dry ingredients to the pumpkin mixture and mix at low speed until thoroughly combined and the batter is smooth. Spread the batter into a greased 13 by 10-inch baking pan. Bake for 30 minutes. Let cool completely before frosting. Cut into bars.

To make the icing: Combine the cream cheese and butter in a medium bowl with an electric mixer until smooth. Add the sugar and mix at low speed until combined. Stir in the vanilla and mix again. Spread on cooled pumpkin bars.

Sunday, September 7, 2014

CURRIED PUMPKIN AND CHEDDAR SOUP

CURRIED PUMPKIN AND CHEDDAR SOUP
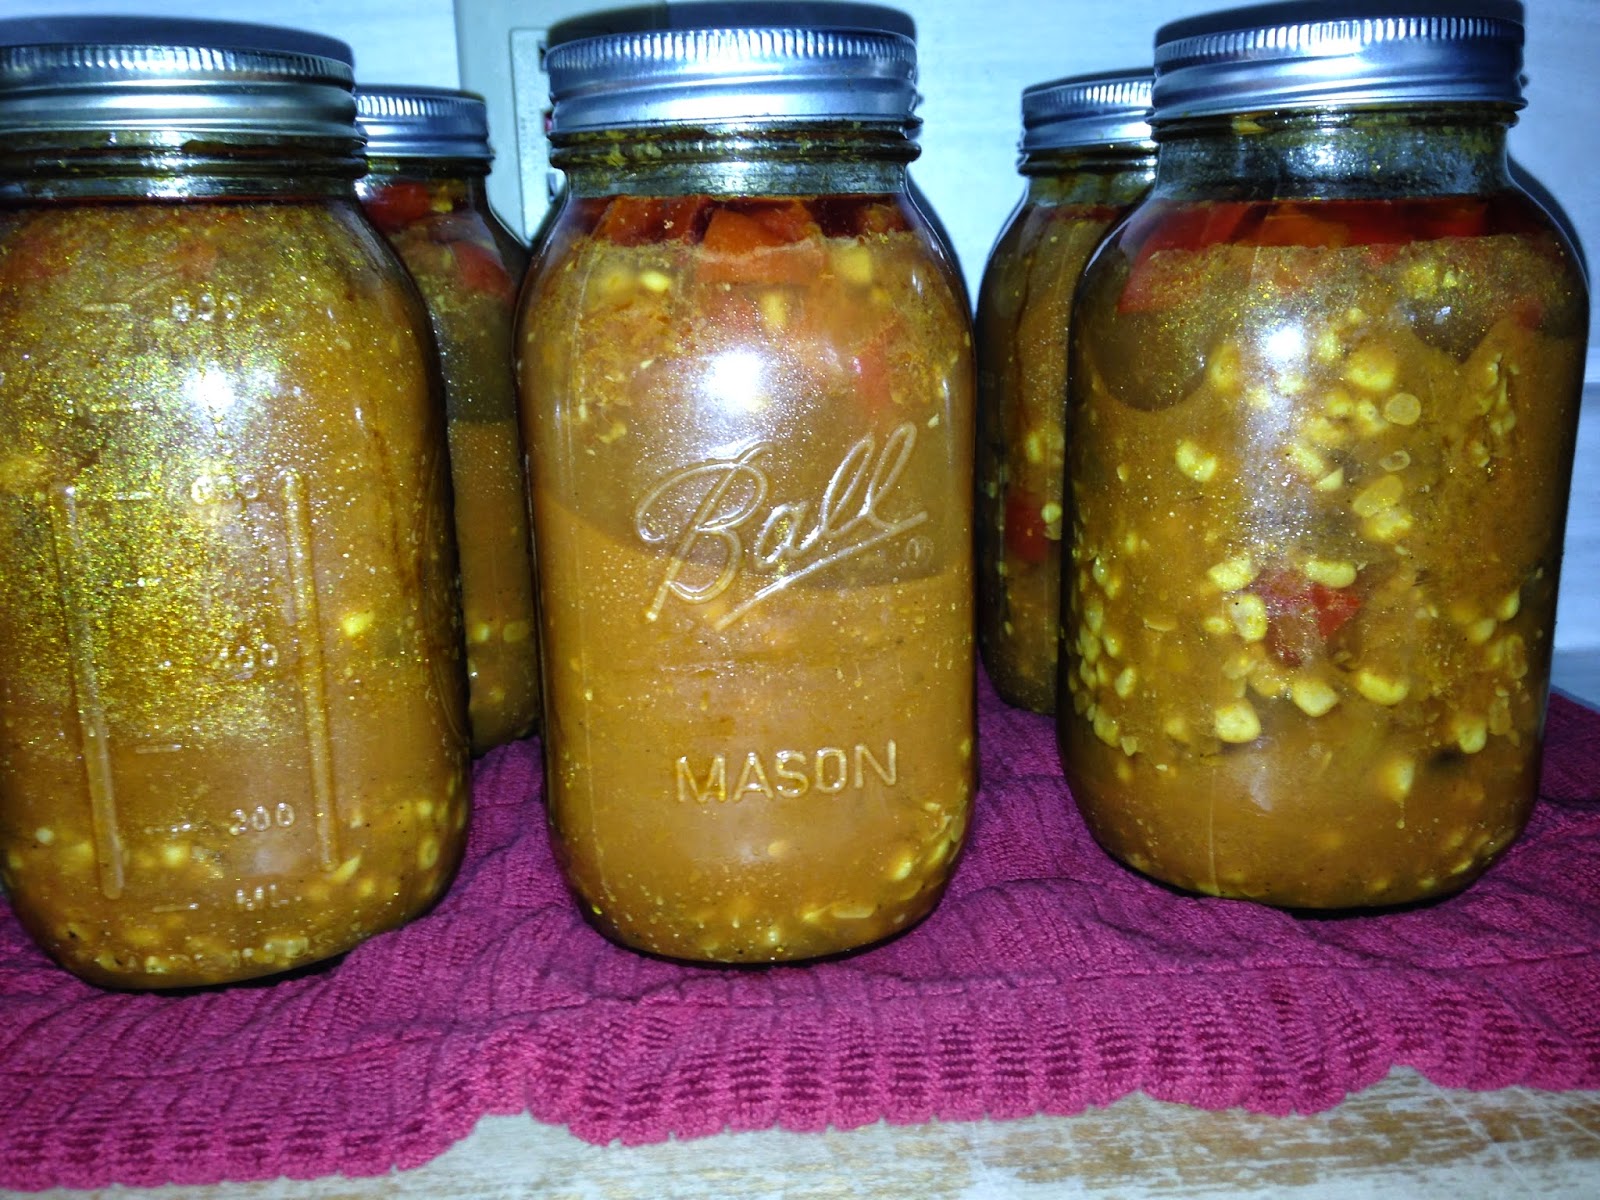
One of our friends from church brought this soup to a soup swap we had last year and Olivia liked it so much she decided to try her hand at canning it.  This is NOT an approved canning recipe so if you make it you may choose not to can it or you may try it if you like experimenting with your home canning.  You may think that is a crazy statement, but if you have canned for a long time like Olivia and I have, you have a feel for what will and will not work.  You always err on the side of caution in processing times and make sure everything is clean, sterilized, and hot.  You also want to make sure everything seals.

This is an excellent savory soup and one that is sure to be a hit this autumn in your house.  If you have never tried home canning your own soup, I can tell you there is nothing better on a cold, winter day than opening a jar of soup and recalling the glory of summer.  Enjoy!
-Nanette


CURRIED PUMPKIN AND CHEDDAR SOUP

Combine the following in a large stock pot:

2 tablespoons olive oil
1 cup chopped onions
1/2 cup chopped celery
1/2 cup chopped red bell pepper

Saute above ingredients in olive oil until the onion is translucent, or about eight minutes.

Add the following to the veggies and cook for about a minute:

1 tablespoon unsalted butter
1 1/2 tablespoon curry powder
1 tablespoon chopped garlic

Stir together and bring to a boil.

Add the following ingredients:

2 cups canned pumpkin (NOT pumpkin pie mix)
1/2 cup canned crushed tomatoes
1/2 teaspoon sage

Bring to a boil and simmer for 15 minutes.

At this point, you can stir the soup (making sure to get the veggies that settle at the bottom), and dish it up.  Serve it with cheddar cheese and croutons.  This is especially yummy with pumpernickel croutons.

If you want to can it, do not add the cheese and croutons (add those when you serve it), follow safe canning practices by ladling the soup into sterilized quart jars, cleaning the rims, adding the two pieces of the lid, and process in a pressure canner at 11 pounds (That's appropriate for my location.) for 90 minutes.  Allow to cool, check for seals, and store.  Bring to a boil for 10 minutes before serving.  Yum!